
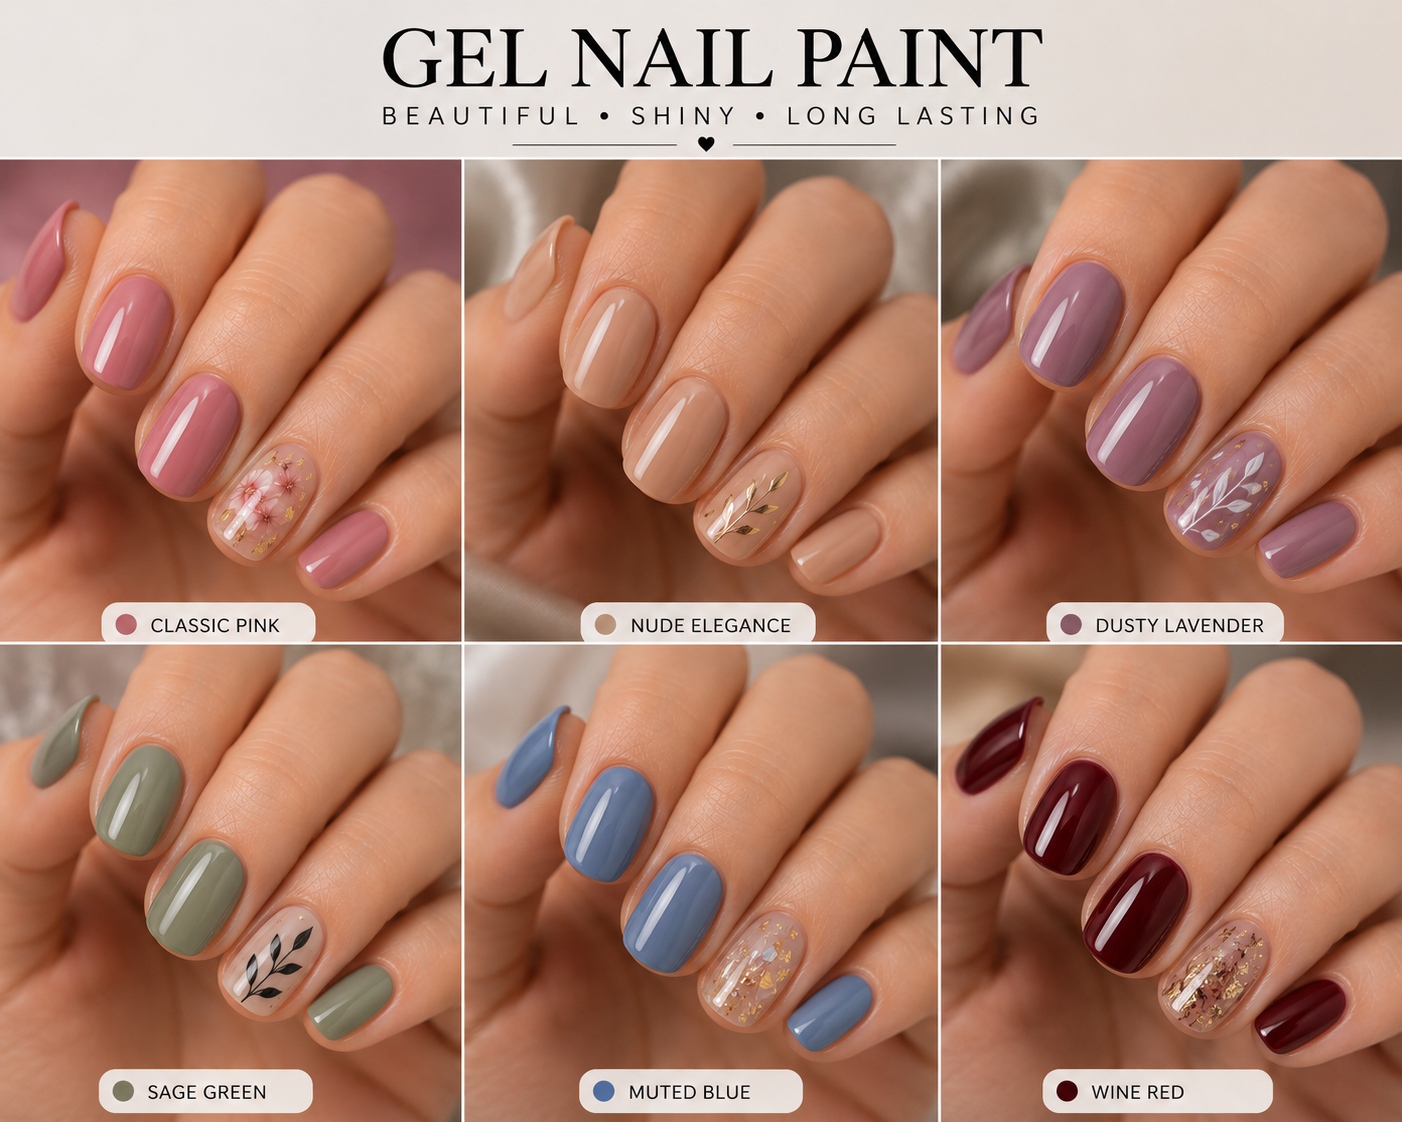
Gel Nail Paint
Place: Faridabad
Radius: 50 km
About This Service
Gel nail paint art without extensions is a technique that uses professional UV/LED-cured gel polishes and highly pigmented nail paints to create beautiful, long-lasting designs directly on your natural nails. It offers a glossy, chip-resistant finish without the length, weight, or maintenance of acrylics or artificial tips. [1, 2, 3, 4, 5]
This manicure style is ideal for natural nail care, offering several benefits and design options:
Key Characteristics
- Natural Strengthening: The multiple layers of gel act as a protective barrier, allowing your natural nails to grow without breaking easily. [1, 2, 3, 4]
- No Length Added: Ideal if you prefer a short, functional nail length or are transitioning away from acrylics. [1, 2]
- Curing Requirements: Because it uses true gel polish, each layer must be cured under a UV/LED lamp for 60 to 120 seconds to harden completely. [1, 2, 3, 4, 5]
- Longevity: Unlike traditional lacquer, a gel manicure typically lasts 2 to 3 weeks without chipping. [1, 2, 3, 4]
Common Art Techniques
- Freehand Drawing: Using fine, highly pigmented "painting gels" and a thin liner brush to paint intricate geometric shapes, abstract lines, or floral patterns. [1]
- Blooming Effect: Applying a special "blooming gel" base that allows drops of colored gel to spread, creating watercolor, marble, or tie-dye effects. [1, 2, 3, 4, 5]
- Cat-Eye or Chrome: Using specialized gels that react to magnets for a 3D shimmer, or buffing chrome powders over a cured base gel for a mirrored finish. [1, 2, 3, 4, 5]
- Ombré & Gradients: Blending two or more gel colors smoothly together on the natural nail bed, often using a small makeup sponge. [1]
Basic Application Process
- Prep: Trim and shape the natural nail, push back cuticles, and buff the surface to remove shine.
- Base Coat: Apply a thin layer of gel base coat and cure it.
- Color & Art: Apply your base gel color and cure. Then, use specialized gel paints to create your nail art, curing after the design is complete.
- Top Coat: Seal the design with a gel top coat and cure for a high-gloss, protective finish. [1, 2]
For a visual guide on painting floral gel nail art directly onto natural nails:


For tips on how to get the paint blending and ombré consistency just right:


If you are considering trying this yourself or want to know more, let me know:
- What specific design or style are you trying to achieve?
- Are you looking for product recommendations for beginners?
I can help you narrow down the exact tools and techniques you need.
beauty services
Gel nail paint art without extensions is a technique that uses professional UV/LED-cured gel polishes and highly pigmented nail paints to create beautiful, long-lasting designs directly on your natural nails. It offers a glossy, chip-resistant finish without the length, weight, or maintenance of acrylics or artificial tips. [1, 2, 3, 4, 5]
This manicure style is ideal for natural nail care, offering several benefits and design options:
Key Characteristics
- Natural Strengthening: The multiple layers of gel act as a protective barrier, allowing your natural nails to grow without breaking easily. [1, 2, 3, 4]
- No Length Added: Ideal if you prefer a short, functional nail length or are transitioning away from acrylics. [1, 2]
- Curing Requirements: Because it uses true gel polish, each layer must be cured under a UV/LED lamp for 60 to 120 seconds to harden completely. [1, 2, 3, 4, 5]
- Longevity: Unlike traditional lacquer, a gel manicure typically lasts 2 to 3 weeks without chipping. [1, 2, 3, 4]
Common Art Techniques
- Freehand Drawing: Using fine, highly pigmented "painting gels" and a thin liner brush to paint intricate geometric shapes, abstract lines, or floral patterns. [1]
- Blooming Effect: Applying a special "blooming gel" base that allows drops of colored gel to spread, creating watercolor, marble, or tie-dye effects. [1, 2, 3, 4, 5]
- Cat-Eye or Chrome: Using specialized gels that react to magnets for a 3D shimmer, or buffing chrome powders over a cured base gel for a mirrored finish. [1, 2, 3, 4, 5]
- Ombré & Gradients: Blending two or more gel colors smoothly together on the natural nail bed, often using a small makeup sponge. [1]
Basic Application Process
- Prep: Trim and shape the natural nail, push back cuticles, and buff the surface to remove shine.
- Base Coat: Apply a thin layer of gel base coat and cure it.
- Color & Art: Apply your base gel color and cure. Then, use specialized gel paints to create your nail art, curing after the design is complete.
- Top Coat: Seal the design with a gel top coat and cure for a high-gloss, protective finish. [1, 2]
For a visual guide on painting floral gel nail art directly onto natural nails:
For tips on how to get the paint blending and ombré consistency just right:
If you are considering trying this yourself or want to know more, let me know:
- What specific design or style are you trying to achieve?
- Are you looking for product recommendations for beginners?
I can help you narrow down the exact tools and techniques you need.
Nail art
Gel nail paint art without extensions is a technique that uses professional UV/LED-cured gel polishes and highly pigmented nail paints to create beautiful, long-lasting designs directly on your natural nails. It offers a glossy, chip-resistant finish without the length, weight, or maintenance of acrylics or artificial tips. [1, 2, 3, 4, 5]
This manicure style is ideal for natural nail care, offering several benefits and design options:
Key Characteristics
- Natural Strengthening: The multiple layers of gel act as a protective barrier, allowing your natural nails to grow without breaking easily. [1, 2, 3, 4]
- No Length Added: Ideal if you prefer a short, functional nail length or are transitioning away from acrylics. [1, 2]
- Curing Requirements: Because it uses true gel polish, each layer must be cured under a UV/LED lamp for 60 to 120 seconds to harden completely. [1, 2, 3, 4, 5]
- Longevity: Unlike traditional lacquer, a gel manicure typically lasts 2 to 3 weeks without chipping. [1, 2, 3, 4]
Common Art Techniques
- Freehand Drawing: Using fine, highly pigmented "painting gels" and a thin liner brush to paint intricate geometric shapes, abstract lines, or floral patterns. [1]
- Blooming Effect: Applying a special "blooming gel" base that allows drops of colored gel to spread, creating watercolor, marble, or tie-dye effects. [1, 2, 3, 4, 5]
- Cat-Eye or Chrome: Using specialized gels that react to magnets for a 3D shimmer, or buffing chrome powders over a cured base gel for a mirrored finish. [1, 2, 3, 4, 5]
- Ombré & Gradients: Blending two or more gel colors smoothly together on the natural nail bed, often using a small makeup sponge. [1]
Basic Application Process
- Prep: Trim and shape the natural nail, push back cuticles, and buff the surface to remove shine.
- Base Coat: Apply a thin layer of gel base coat and cure it.
- Color & Art: Apply your base gel color and cure. Then, use specialized gel paints to create your nail art, curing after the design is complete.
- Top Coat: Seal the design with a gel top coat and cure for a high-gloss, protective finish. [1, 2]
For a visual guide on painting floral gel nail art directly onto natural nails:
For tips on how to get the paint blending and ombré consistency just right:
If you are considering trying this yourself or want to know more, let me know:
- What specific design or style are you trying to achieve?
- Are you looking for product recommendations for beginners?
I can help you narrow down the exact tools and techniques you need.